Booking에 User의 Id를 저장하는 방법 구현
이번에는 User와 Booking이 1:N 관계일 때 Booking에 User의 Id를 저장하는 예시를 구현한다.
models/user2.js
const mongoose = require('mongoose');
const { Schema } = mongoose;
const user2Schema = new Schema({
  name: {
    type: String,
    required: true
  },
  createdAt: {
    type: Date,
    default: Date.now,
  },
});
module.exports = mongoose.model('User2', user2Schema);
models/booking2.js
const mongoose = require('mongoose');
const { Schema } = mongoose;
const booking2Schema = new Schema({
  name: {
    type: String,
    required: true
  },
  user2Id: {
    type:Schema.Types.ObjectId,
    ref:'User2'
  },
  createdAt: {
    type: Date,
    default: Date.now,
  },
});

module.exports = mongoose.model('Booking2', booking2Schema);
우선 mongoose를 이용하여 스키마를 정의한다. 위에서 설명한 대로 Booking2에는 User2Id라는 속성이 있고 User2의 Id를 저장한다.
graphql/schema/index.js
const { gql } = require('apollo-server');
const typeDefs = gql`
  type Query {
    user2s: [User2]
    booking2s: [Booking2]
  }
  type Booking2{
    _id: ID
    name:String
    user2: User2
    createdAt: String
  }
  input Booking2Input{
    name: String
    user2Id: String
  }
  type User2{
    _id: ID
    name: String
    booking2s: [Booking2]
    createdAt: String
  }
  input User2Input{
    name: String
  }
  type Mutation{
    createUser2(user2Input: User2Input): User2!
    createBooking2(booking2Input: Booking2Input): Booking2!
  }
`;

module.exports = typeDefs;
Query, Booking2, User2, Mutation 타입을 정의하고 Booking2Input, User2Input 인풋을 정의한다. mongoose에서 정의한 스키마에서는 User1에 Booking1의 Id가 없었지만 Graphql에서는 User1에 어떤 Booking1이 포함되는지 요청할 수 있기 때문에 다음과 같이 작성할 수 있다.
graphql/resolvers/index.js
const User2 = require('../../models/user2');
const Booking2 = require('../../models/booking2');
const resolvers = {
  Query: {
    async user2s(_, args) {
      try {
        const user2s = await User2.find();
        return user2s;
      } catch (err) {
        console.log(err);
        throw err;
      }
    },
    async booking2s(_, args) {
      try {
        const booking2s = await Booking2.find();
        return booking2s;
      } catch (err) {
        console.log(err);
        throw err;
      }
    },
  },
  User2: {
    async booking2s(_, args) {
      const booking2s = await Booking2.find({ user2Id: { $in: _._id } });
      return booking2s
    },
  },
  Booking2: {
    async user2(_, args) {
      try {
        const user2 = await User2.findById(_.user2Id);
        return user2;
      } catch (err) {
        console.log(err);
        throw err;
      }
    },
  },
  Mutation: {
    async createUser2(_, args) {
      try {
        const user2 = new User2({
          ...args.user2Input
        })
        const result = await user2.save();
        return result;
      } catch (err) {
        console.log(err);
        throw err;
      }
    },
    async createBooking2(_, args) {
      try {
        const booking2 = new Booking2({
          name: args.booking2Input.name,
          user2Id: args.booking2Input.user2Id
        })
        const result = await booking2.save();
        return result;
      } catch (err) {
        console.log(err);
        throw err;
      }
    },
  }
};

module.exports = resolvers;
Query의 user2s 함수는 모든 User2를 반환하고, booking2s 함수는 모든 Booking2을 반환한다. User2 Type에 대한 요청은 User2에서 담당한다. 이때 User2의 Booking2s를 요청할 때 User2의 Id를 이용하여 Booking2s를 찾아야 하므로 별도의 로직을 작성한다. Mutation의 createUser2는 새로운 User2를 생성한다. createBooking1에서는 새로운 Booking1을 저장한다.
Playground 실행
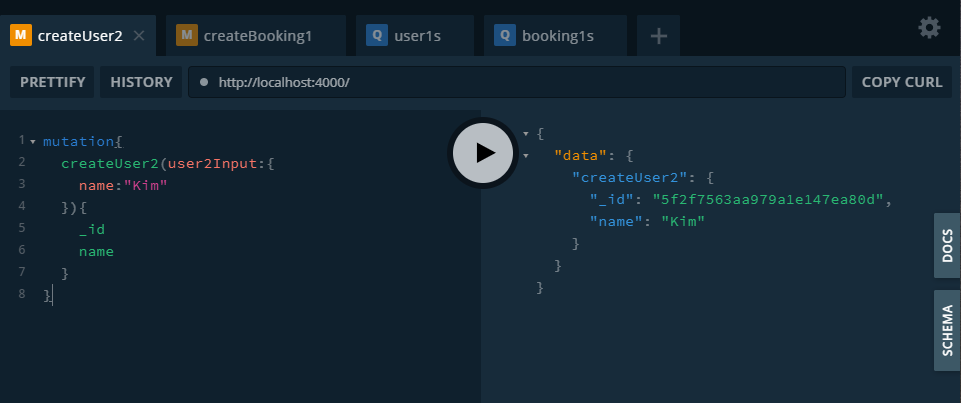
애플리케이션을 실행하고 playground에서 우선 user를 생성한다.
mutation{
  createUser2(user2Input:{
    name:"Kim"
  }){
    _id
    name
  }
}
결과는 다음과 같다.

다음으로는 생성된 User1의 _id를 이용하여 Booking1을 생성한다.
mutation{
  createBooking2(booking2Input:{
    name:"Booking Movie"
    user2Id:"5f2f7563aa979a1e147ea80d"
  }){
    _id
    name
    user2{
      _id
      name
    }
  }
}
결과는 다음과 같다.

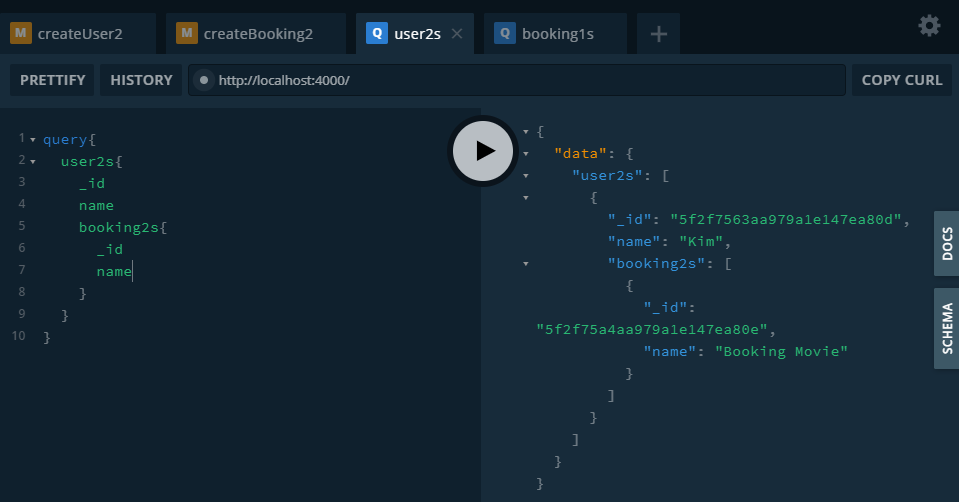
이제 생성된 User2나 Booking2의 정보를 조회한다.
query{
  user2s{
    _id
    name
    booking2s{
      _id
      name
    }
  }
}
query{
  booking2s{
    _id
    name
    user2{
      _id
      name
    }
  }
}
'개인 개발 프로젝트 > Graphql, MongoDB 실습' 카테고리의 다른 글
| [Graphql, MongoDB 실습] 9. N:M 관계 (0) | 2020.08.09 |
|---|---|
| [Graphql, MongoDB 실습] 7. 1:N 관계 예시 (1) (0) | 2020.08.08 |
| [Graphql, MongoDB 실습] 6. 1:N 관계 (0) | 2020.08.08 |
| [Graphql, MongoDB 실습] 5. Graphql Mutation with Transaction (0) | 2020.08.06 |
| [Graphql, MongoDB 실습] 4. Graphql Mutation (0) | 2020.08.05 |